A white background with a few lines on it

Mastering the Exterior Painting Process: A Guide for Homeowners by Scotty's Painting LLC

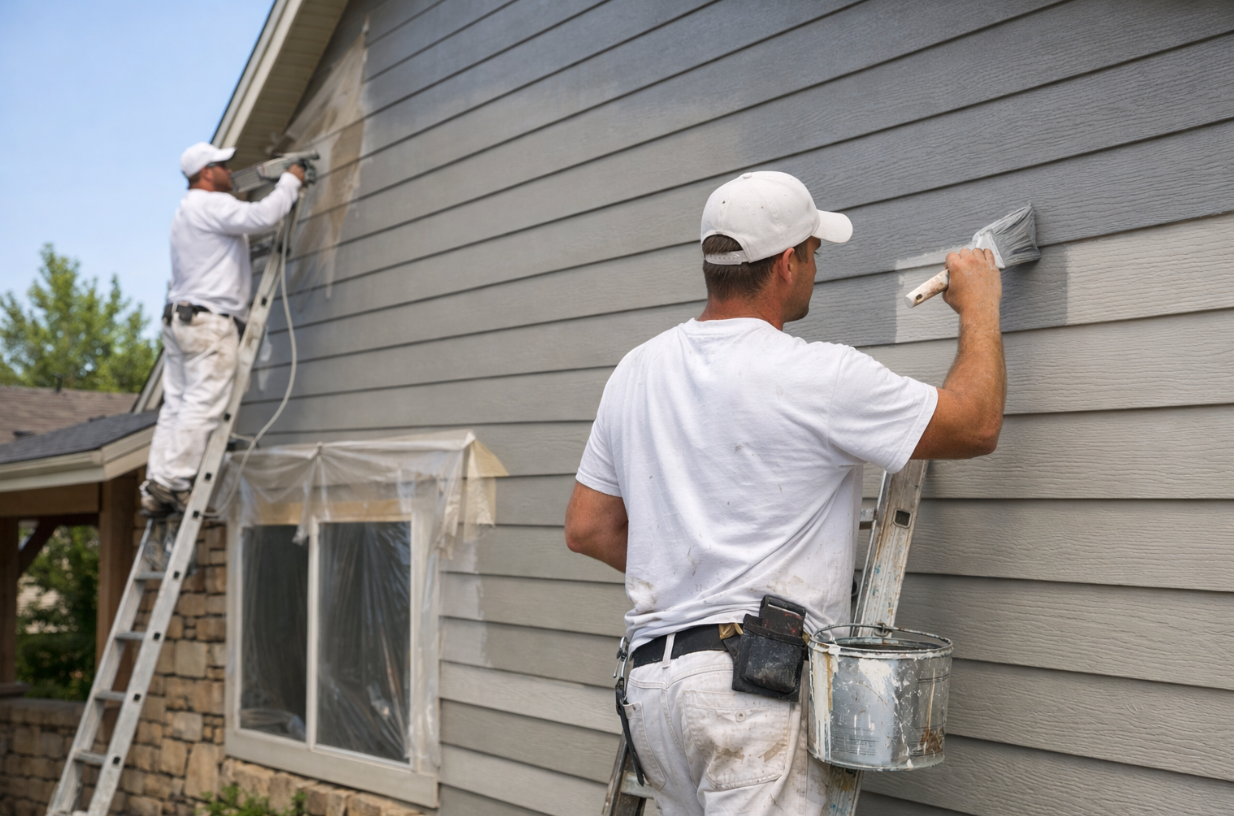
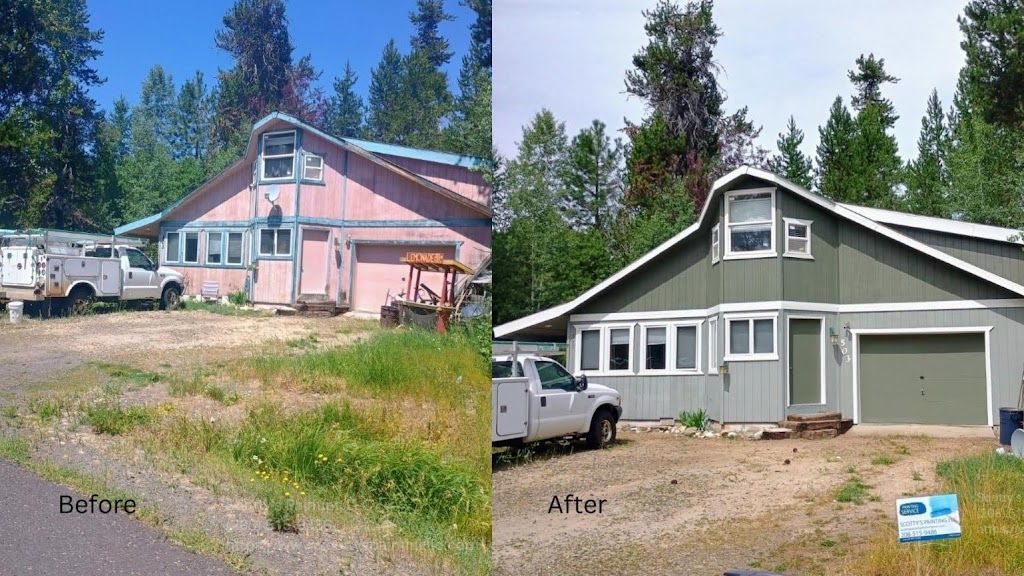
Painting the exterior of your home is more than just a facelift; it's an investment in durability and curb appeal. At Scotty's Painting LLC, we understand that mastering the exterior painting process requires both skill and attention to detail. From the moment you assess the condition of your home's surfaces to the final brushstroke, every step is crucial for a long-lasting finish. Our guide will walk you through the essentials of painting preparation, including selecting the right environmentally friendly paints and using professional-grade tools and equipment. Whether you're a DIY enthusiast or considering professional painters, this resource will provide you with the confidence and knowledge to achieve the stunning results your home deserves.

Preparing Your Home for Painting

Before you start painting, it's crucial to prepare your home's exterior properly. This section covers the key steps to ensure a smooth and long-lasting paint job.

Assessing Surface Conditions

The first step in any exterior painting project is to assess the current condition of your home's surfaces. This evaluation helps identify areas that need repair or special attention before painting begins.

Start by walking around your house and looking for signs of damage such as peeling paint, cracks, or rot. Pay close attention to areas exposed to harsh weather conditions or moisture.

Note any loose or damaged siding, as these areas will need to be repaired or replaced before painting. Also, check for any mold or mildew growth, which should be treated with appropriate cleaners.

Lastly, examine the caulking around windows and doors. If it's cracked or missing, it will need to be replaced to prevent water infiltration and ensure a neat paint job.

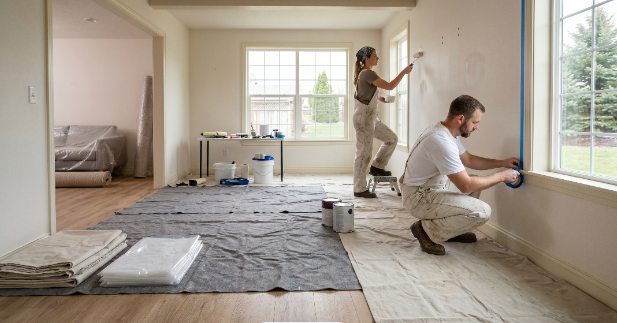
Essential Painting Preparations

Proper preparation is key to achieving a professional-looking and long-lasting paint job. This stage involves cleaning, repairing, and protecting the exterior surfaces of your home.

Begin by pressure washing the entire exterior to remove dirt, grime, and loose paint. This step is crucial for paint adhesion and overall durability of the finish. Allow the surfaces to dry completely before proceeding.

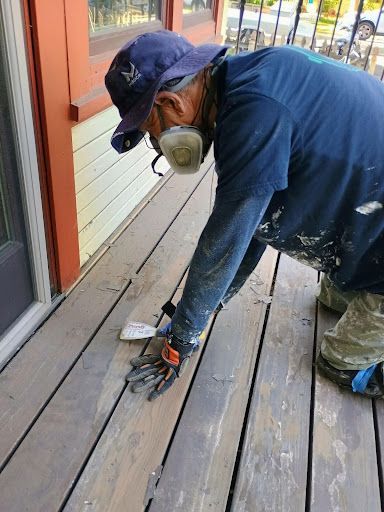
Then, remove any loose or peeling paint and sand down rough spots to achieve a smooth surface. Fix any damaged wood, siding, or stucco, and replace any sections that are rotted.

Finally, protect areas you don't want painted by covering them with plastic sheeting and painter's tape. This includes windows, doors, light fixtures, and any landscaping close to the house.

Choosing the Right Primer

Selecting the appropriate primer is a critical step in the exterior painting process. The right primer creates a strong foundation for your paint, enhancing its adhesion and longevity.

For bare wood or porous surfaces, use a high-quality oil-based primer. This type of primer seals the surface and provides excellent adhesion for the topcoat.

If you're painting over a previously painted surface in good condition, a latex primer might be sufficient. For metal surfaces, choose a primer specifically designed for metal to prevent rust and corrosion.

When dealing with stains or tannins that might bleed through the paint, opt for a stain-blocking primer. This will prevent discoloration and ensure a uniform finish.

Selecting the Perfect Paint

Choosing the right paint is essential for achieving a beautiful and durable finish. This section will guide you through the various options available and help you make an informed decision.

Types of Paint and Finishes

Understanding the different types of paint and finishes available is crucial for selecting the best option for your home's exterior. Each type has its unique properties and benefits.

Latex paints are popular for their ease of use, quick drying time, and excellent color retention. They're also more flexible, which helps prevent cracking and peeling over time.

Oil-based paints, while less common, offer superior adhesion and durability. They're beneficial for surfaces that require extra protection or have been previously painted with oil-based products.

Finishes vary from flat to high-gloss. Flat finishes are effective at concealing imperfections but offer less durability, whereas glossier finishes are more resistant to wear and tear, though they tend to emphasize surface flaws.

Importance of Paint Durability

The durability of your chosen paint plays a significant role in how long your exterior paint job will last and how well it will protect your home from the elements.

High-quality, durable paints contain a higher solid content, resulting in a thicker, more protective coating. This helps resist fading, chalking, and peeling, even in harsh weather conditions.

Look for paints with good UV resistance to prevent color fading and deterioration from sun exposure. Additionally, paints with mildew-resistant properties are beneficial in humid climates.

Remember, while durable paints may cost more upfront, they often prove more cost-effective in the long run by requiring less frequent repainting and providing better protection for your home.

Environmentally Friendly Paints

Environmentally friendly paints are becoming increasingly popular due to their low impact on the environment and improved safety for both painters and homeowners.

These paints typically have low or zero volatile organic compounds (VOCs), which means they emit fewer harmful fumes during and after application. This makes them safer to use and better for air quality.

Many eco-friendly paints are made from natural or recycled materials, reducing their environmental footprint. Some even offer additional benefits like improved insulation properties or the ability to reflect heat.

When choosing an environmentally friendly paint, look for certifications from recognized organizations that verify the product's green credentials.

Tools and Techniques for Professional Results

To achieve a professional-quality paint job, you need the right tools and techniques. This section covers the essentials you'll need and how to use them effectively.

Essential Painting Tools and Equipment

Having the right tools can make a significant difference in the quality and efficiency of your painting project. Here's a list of essential items you'll need:

  • High-quality paintbrushes in various sizes
  • Paint rollers with appropriate nap length for your surface
  • Extension poles for reaching high areas
  • Paint sprayer for large surfaces (optional)
  • Sturdy ladders or scaffolding for safe access to all areas
  • Drop cloths to protect surrounding areas
  • Painter's tape for clean lines and protection

Investing in good quality tools will not only make your job easier but also contribute to a better finish. Remember to clean and store your tools properly to extend their lifespan.

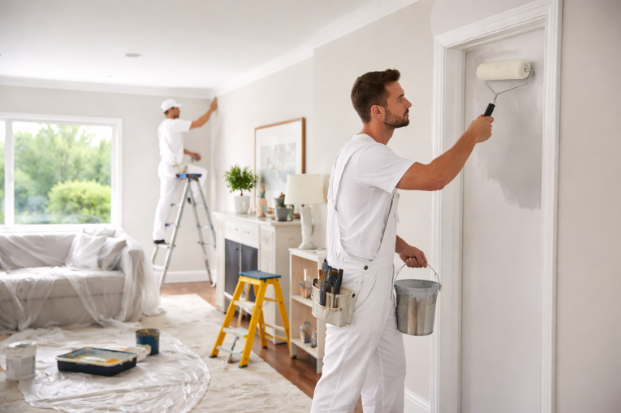
Techniques for Clean Lines and Even Coats

Achieving clean lines and even coats is key to a professional-looking paint job. Here are some techniques to help you get the best results:

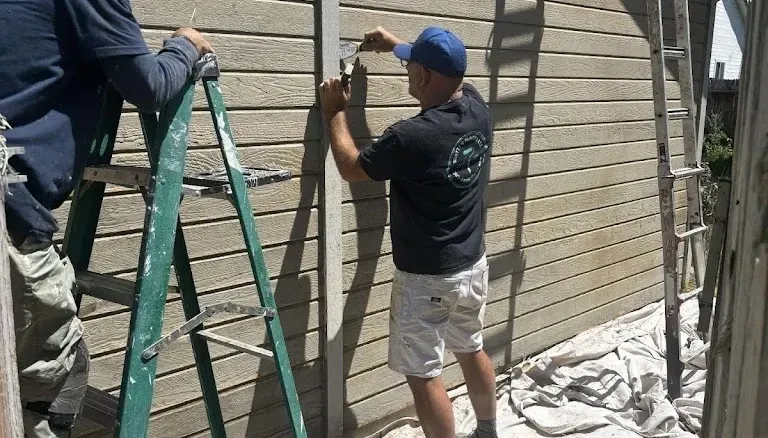
Start by "cutting in" around edges and trim with a brush before rolling larger areas. This technique helps create crisp, clean lines.

When using a roller, apply paint in a "W" pattern, then fill in the gaps. This method ensures even coverage and helps avoid visible roller marks.

When using a spray painter, maintain a consistent distance from the surface and employ overlapping strokes to ensure coverage. Practice on a test surface to gain confidence with the technique before applying it to your house.

Dealing with Textures and Materials

Different exterior materials and textures require specific approaches to achieve the best results. Here's how to handle common surfaces:

For rough textures like stucco or brick, use a roller with a longer nap to ensure paint gets into all the crevices. You may need to back-brush after rolling to work the paint into the texture.

When painting smooth siding, a shorter nap roller or sprayer can provide an even finish. Be sure to follow the grain of the siding for the most natural look.

For metal surfaces like gutters or downspouts, use a brush or small roller designed for smooth surfaces. Apply thin, even coats to prevent drips and runs.

Enhancing Curb Appeal with Color

The right color choice can dramatically enhance your home's curb appeal. This section will help you navigate color selection and work effectively with professional painters.

Trends in Color Selection

Staying informed about current color trends can help you make choices that keep your home looking fresh and appealing. Here are some recent trends in exterior paint colors:

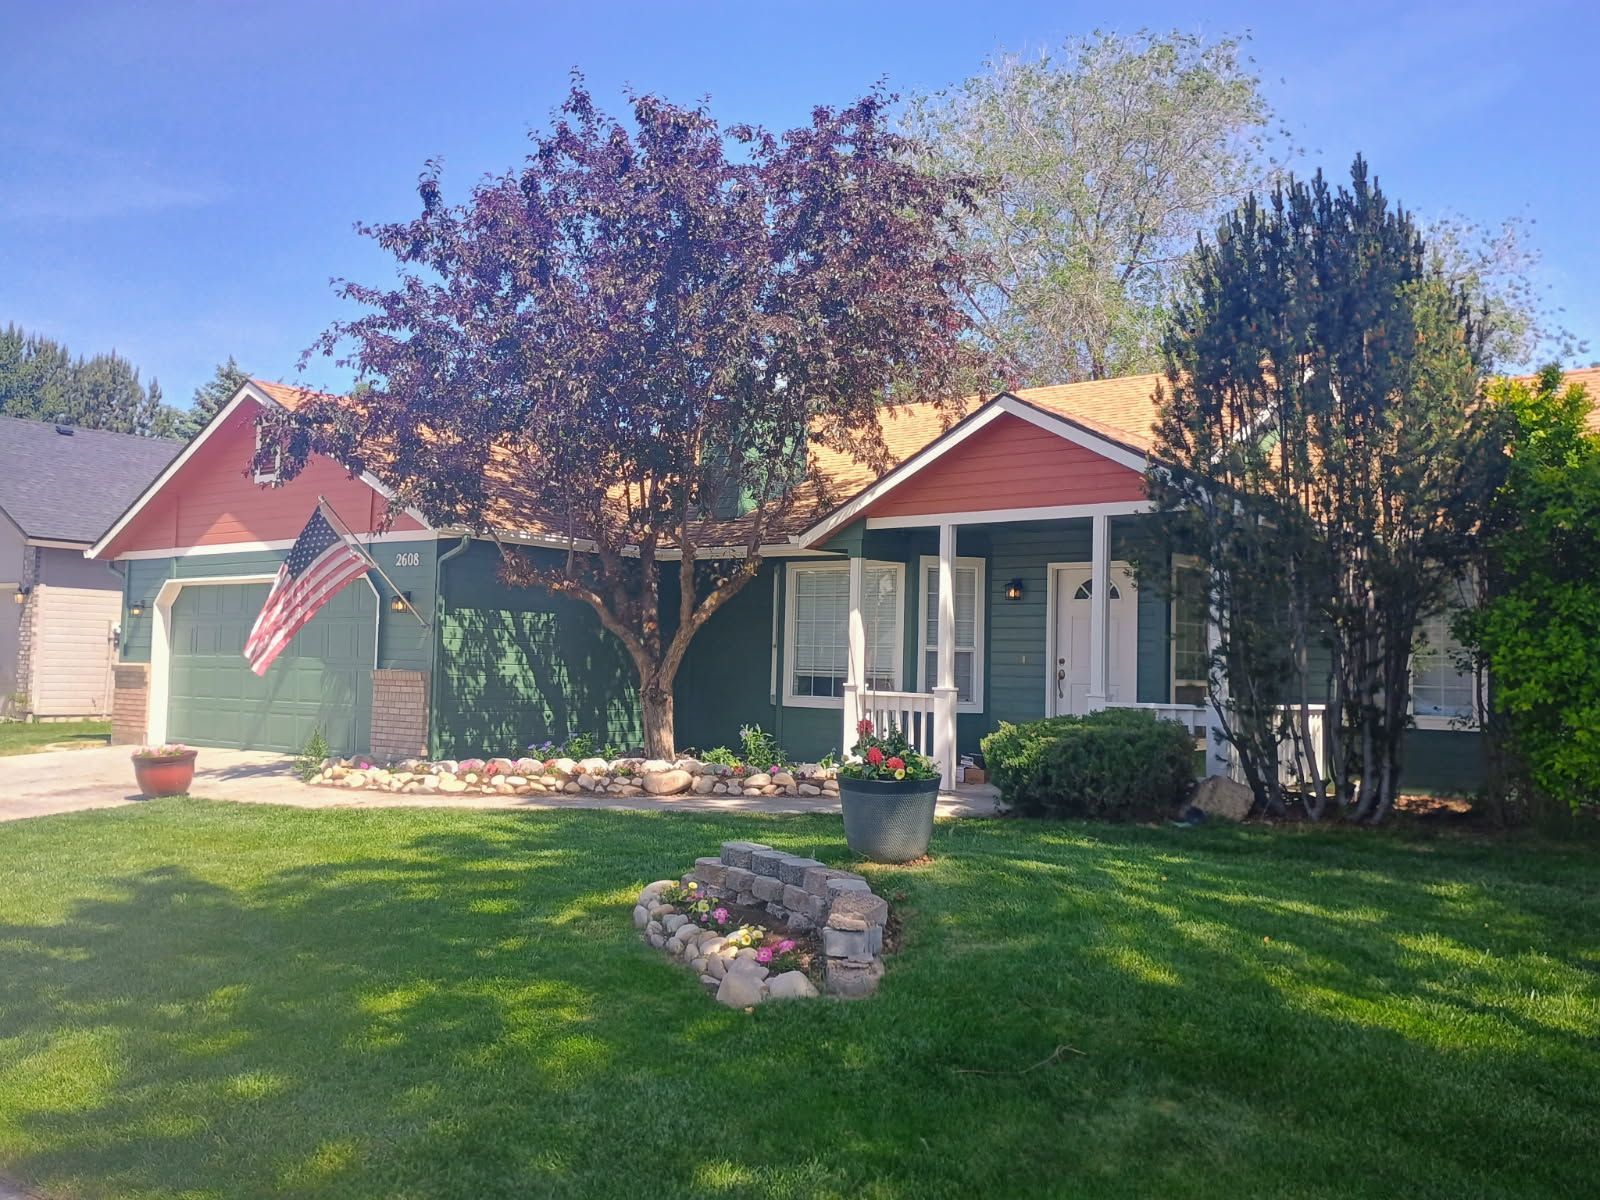
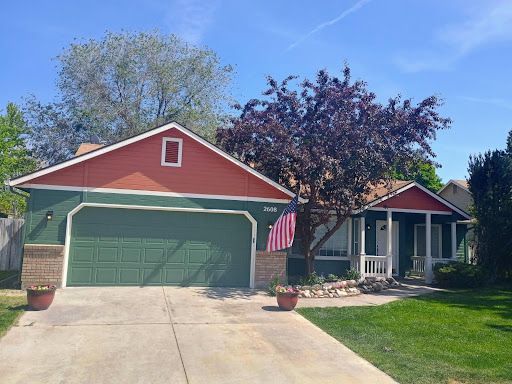
  • Earthy tones like warm greys, soft greens, and muted blues are popular for their natural, calming effect.
  • Bold accent colors for front doors and shutters continue to be a trend, adding personality to neutral color schemes.
  • Monochromatic color schemes, using different shades of the same color, are gaining popularity for their sophisticated look.

Remember, while trends can be inspiring, it's important to choose colors that you'll be happy with for years to come. Consider your home's architecture and your personal style when making decisions.

Tips for Harmonizing with Home Style

Choosing colors that complement your home's architectural style can greatly enhance its overall appearance. Here are some tips to consider:

For traditional homes, classic color combinations like white with black or navy accents often work well. Colonial-style homes often look best in historical colors.

Modern or contemporary homes can handle bolder color choices. Consider using contrasting colors for architectural features to create visual interest.

For craftsman-style homes, earth tones and natural colors are often a good fit, reflecting the style's connection to nature.

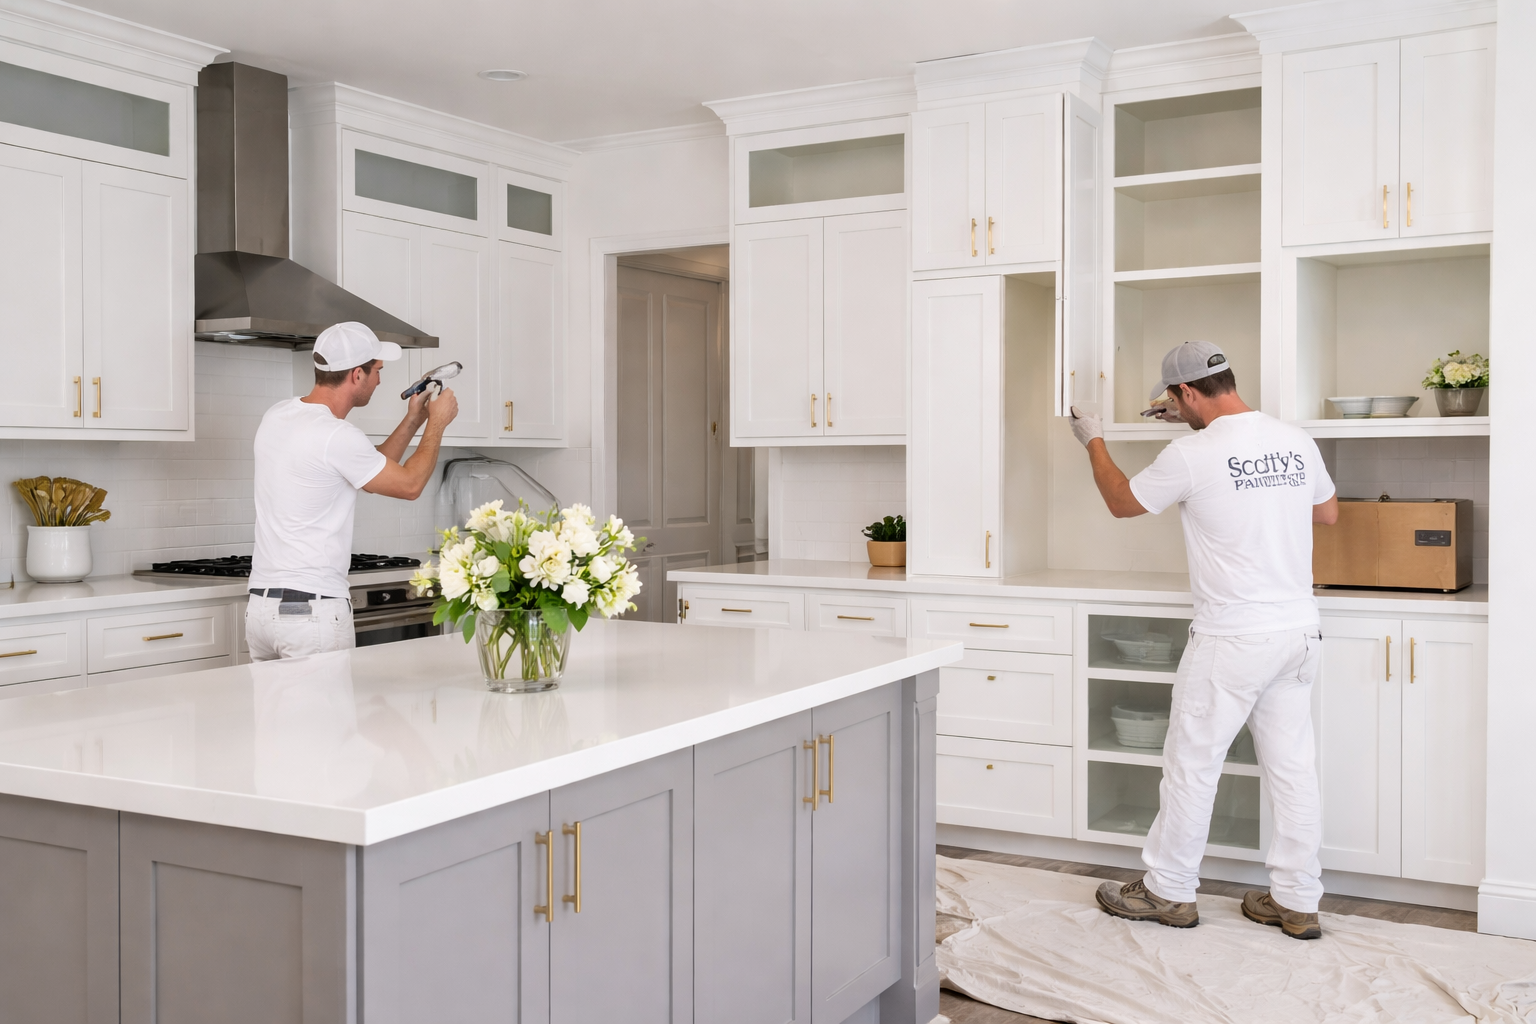
Collaborating with Professional Painters

Working with professional painters can help you achieve the best results for your exterior painting project. Here's how to collaborate effectively:

Communicate your vision clearly, including any specific colors or finishes you have in mind. Professional painters can offer valuable advice on color selection and finishes based on their experience.

Ask for samples or digital mock-ups to help visualize the final result. Many painting companies now offer color visualization tools to help you make decisions.

Discuss the painting process in detail, including preparation steps and the timeline for completion. This ensures everyone is on the same page and helps avoid misunderstandings.

Maintaining Your Painted Exterior

Proper maintenance can significantly extend the life of your exterior paint job. This section covers key aspects of maintaining your newly painted home.

Scheduling Around Weather Conditions

Timing your exterior painting project with favorable weather conditions is crucial for achieving the best results. Here are some factors to consider:

Ideal painting conditions include temperatures between 50°F and 85°F, with low humidity. Avoid painting in direct sunlight or when rain is forecasted within 24 hours of painting.

In most regions, late spring and early fall offer the best conditions for exterior painting. However, this can vary depending on your local climate.

If you're working with professional painters, they can help you plan the best time for your project based on local weather patterns and their schedule.

Regular Maintenance Tips

Regular maintenance can help preserve your paint job and keep your home looking fresh. Here are some tips to follow:

Inspect your home's exterior annually for signs of wear or damage. Look for peeling paint, cracks, or areas where caulk has deteriorated.

Clean your home's exterior at least once a year using a gentle detergent and a soft-bristled brush or low-pressure washer. This removes dirt and prevents mold growth.

Touch up small areas of damage promptly to prevent larger issues. Keep some extra paint on hand for these touch-ups.

Troubleshooting Common Challenges

Even with proper preparation and application, you may encounter some challenges with your exterior paint. Here's how to address common issues:

For peeling paint, scrape off the loose paint, sand the area smooth, and apply primer before repainting. If peeling is widespread, it may indicate a moisture problem that needs to be addressed.

If you notice fading, especially on south-facing walls, consider using a paint with better UV resistance in the future. In the meantime, a fresh coat of paint can restore the color.

For mildew growth, clean the affected area with a solution of one part bleach to three parts water. Rinse thoroughly and allow to dry before repainting with a mildew-resistant paint.

Remember, if you're unsure about how to handle a particular issue, it's always best to consult with professional painters for advice. They can provide expert guidance and help ensure your home's exterior stays beautiful for years to come.

"A well-maintained exterior paint job not only enhances your home's appearance but also protects it from the elements. Regular care and prompt attention to any issues will keep your home looking its best for years to come."

- Scotty's Painting LLC

For more tips and advice on exterior painting, or to schedule a professional consultation, contact us today. Our team at Scotty's Painting LLC is always ready to help you achieve the best results for your home.

Don't forget to check out our Facebook page for the latest updates and special offers!

By Adam Moore September 30, 2025
Tired of your kitchen and bathroom feeling dated? Discover the latest Boise cabinet paint trends that are transforming homes across the city. From timeless whites to bold navy blues, these hues can completely redefine your space, enhancing both style and charm. You'll learn how to choose the right finishes for lasting beauty and even how to pair colors with countertops for a cohesive look. Get ready to turn your renovation dreams into reality and create spaces that truly capture Boise's unique spirit. For professional cabinet painting services in Boise, visit us at Scotty's Painting LLC to learn more about how we can help refresh your home. Trending Kitchen Cabinet Colors
By Adam Moore September 29, 2025
Imagine transforming your home into a canvas that captures the soul of Boise. The latest Boise interior paint trends offer a palette that mirrors the city's stunning landscapes and vibrant culture. Think soft greens reminiscent of nearby mountains and warm taupe that echoes the desert climate. You'll discover how these popular interior paint colors can create inviting spaces that reflect your style. Ready to infuse your home with Boise's unique charm? Dive in to explore how these colors can redefine your living spaces. For expert guidance on bringing these trends to life in your home, visit us at Scotty's Painting LLC for professional interior painting services. Boise's Colorful Influence
By Adam Moore September 29, 2025
Tired of your home's dull exterior? Dive into the vibrant world of Boise exterior paint colors and watch your house come alive with personality. Picture hues that echo the majestic mountains, or modern tones that add a fresh twist to your curb appeal. We'll show you how local architecture influences color choices, ensuring your home fits perfectly into the scenic Idaho backdrop. Discover tips for picking shades that not only boost charm but also withstand the elements. Transform your Boise home into a neighborhood standout today! Learn more about our exterior painting services at https://www.scottyspaintingllc.com/exterior-painting . Boise's Unique Color Trends
By Adam Moore September 17, 2025
Every brushstroke counts when it comes to transforming your home. Hiring experts in professional painting isn't just about changing colors—it's about achieving a flawless finish that stands the test of time. From meticulous surface preparation to using top-notch paint quality materials, the interior painting process demands the touch of skilled hands. You'll discover how expert application techniques not only enhance beauty but also ensure durability and long-lasting results. Ready to see the difference? Let's explore why having professionals handle your painting needs is a decision you'll never regret. Visit us at Scotty's Painting LLC to learn more about our professional interior painting services.## Initial Consultation Importance The first step in any professional painting project is the initial consultation. This crucial phase sets the foundation for a successful outcome, ensuring that the client's vision aligns with the painter's expertise.
By Adam Moore August 25, 2025
Transforming your home with a fresh coat of paint can instantly elevate its ambiance, and with Scotty's Painting LLC, you get the expertise needed to achieve a flawless finish. From the initial stages of color selection to the final walkthrough, our team guides you through every step of the process, ensuring that your vision comes to life. Understanding the importance of meticulous surface preparation and the right painting techniques can make all the difference in creating long-lasting beauty. Whether it's choosing cohesive color schemes or selecting the perfect paint finishes for each room, our professional painters are here to offer their insights and craftsmanship. Ready to refresh your living space? Call us today at (208) 515-9486 or visit our website to learn more about how Scotty's Painting LLC can transform your home with our trusted residential painting services.## Stages of Interior Painting
By Adam Moore August 15, 2025
Transforming your cabinets from dull to dazzling is more than just a simple color change; it's a comprehensive process that breathes new life into your space. At Scotty's Painting LLC , we understand the art of achieving a flawless finish, combining expert cleaning, sanding, and priming techniques to prepare cabinets for a stunning makeover. Our professional painters guide you through paint types and finishes that promise both durability and style, ensuring that every stroke enhances your home's appeal. Whether you're a homeowner looking to update your kitchen or a property manager aiming to boost property value, knowing the right painting techniques can make all the difference. Join us as we explore the essentials of cabinet painting, helping you turn your vision into reality with confidence and ease.## Initial Consultation Process
By Adam Moore August 11, 2025
Choosing the right paint finish can completely transform the feel of your home, adding a fresh and vibrant touch to your living spaces. Whether you're drawn to the understated elegance of matte paint, the soft sheen of satin, or the bold sparkle of metallic, each option offers unique possibilities for enhancing your interior decor. At Scotty's Painting LLC, we believe that every brushstroke is an opportunity to reflect your personal style and taste. Our team is here to guide you through the world of paint finishes, providing expert advice and interior painting tips that make the DIY home improvement process both fun and rewarding. Ready to create eye-catching walls that tell your story? Call today or visit us to explore how our painting techniques can bring new life to your home aesthetics.  Understanding Paint Finishes
July 31, 2025
Choosing the right door colors and finishes can completely revamp your home's exterior, giving it a modern and inviting look. With the latest trends in door painting, homeowners and real estate agents can enhance curb appeal, making a bold statement that reflects personal style and taste. Whether you're considering a vibrant hue or a classic neutral, color choices for doors can significantly impact the overall aesthetic of your property. In this post, we'll explore a variety of painting techniques and share valuable tips to help you achieve a flawless finish that lasts. Get ready to transform your doors into stunning focal points with expert advice from Scotty's Painting LLC , where we're committed to helping you achieve a beautiful and cohesive home exterior. Exploring Door Painting Techniques Door painting is an art that can transform your home's appearance. Let's dive into the essential techniques that will help you achieve a professional-looking finish. Preparing Surfaces for Painting Proper surface preparation is crucial for a long-lasting paint job. Start by cleaning the door thoroughly to remove dirt and grime. Next, sand the surface lightly to create a smooth base for the paint to adhere to. Fill any holes or cracks with wood filler and sand again once dry. Remove all hardware, including doorknobs and hinges, to ensure a clean application. If you're working with a metal door, use a rust-inhibiting primer to prevent future issues. Finally, wipe down the door with a tack cloth to remove any dust before you begin painting. This step-by-step process, as recommended by Scotty's Painting LLC , ensures your door is primed for a flawless finish. Selecting the Ideal Paint and Finish Choosing the right paint and finish is key to achieving a beautiful and durable result. For exterior doors, opt for high-quality, weather-resistant paints that can withstand the elements. Consider the material of your door when selecting paint. Wood doors benefit from oil-based or 100% acrylic paints, while metal doors require specially formulated options. The finish you choose can impact both appearance and longevity. Here's a quick comparison:
By Adam Moore July 30, 2025
Choosing the Best Paint Selecting the right paint is crucial for a successful cabinet painting project. This section will guide you through understanding different paint types and the importance of using high-quality materials. Understanding Paint Types When it comes to cabinet painting, not all paints are created equal. The type of paint you choose can significantly impact the final result and the longevity of your project. Oil-based paints have been a traditional choice for cabinets due to their durability and smooth finish. They take longer to dry but create a hard, resistant surface. Water-based paints, on the other hand, are gaining popularity. They dry faster, have lower VOC emissions, and are easier to clean up. Many modern water-based paints are formulated specifically for cabinets, offering excellent durability. Chalk paint has gained popularity due to its ease of use and vintage appearance. It doesn't require primer and adheres well to most surfaces. However, it may need additional sealing for long-term durability. The Importance of High-Quality Materials Using high-quality paint and materials is essential for achieving a professional-looking and long-lasting finish on your cabinets. Scotty's Painting LLC emphasizes the importance of quality in its cabinet painting services. Premium paints often have better coverage, requiring fewer coats. This can save time and effort in the long run. They also tend to have superior adhesion properties, reducing the risk of peeling or chipping over time. High-quality brushes and rollers can make a significant difference in the application process. They help achieve a smoother finish with fewer brush strokes or roller marks. Investing in a high-quality primer can enhance paint adhesion and coverage, particularly when painting over dark colors or wood grain. It can also help prevent stains or wood tannins from bleeding through the paint. Prepping for Perfection Proper preparation is the foundation of a successful cabinet painting project. This section covers the essential surface preparation steps and the tools required for the job. Surface Preparation Essentials Preparing your cabinets properly before painting is crucial for achieving a smooth, long-lasting finish. This step can't be skipped if you want professional-looking results. Start by removing all hardware from the cabinets. This includes handles, knobs, and hinges. It's also a good idea to label each piece so you can easily reinstall it later. Clean the cabinets thoroughly to remove any grease, dirt, or grime. A degreaser or TSP (trisodium phosphate) solution works well for this. Rinse with clean water and allow to dry completely. Next, sand the surfaces lightly to create a better surface for the paint to adhere to. Use fine-grit sandpaper and be sure to remove all dust afterward with a tack cloth. For cabinets with a glossy finish, you may need to use a liquid deglosser to remove the gloss. This step helps the new paint bond better to the surface. Must-Have Tools for Success Having the right tools on hand can make your cabinet painting project go much smoother. Here's a list of essential items you'll need: Quality paintbrushes and rollers Painter's tape Sandpaper (various grits) Tack cloths Primer Paint trays Drop cloths Screwdriver for removing hardware For a more detailed list of recommended tools, check out this guide from The Full Hearted Home . Investing in good quality tools can make a significant difference in the ease of application and the final result. Don't skimp on brushes and rollers in particular, as these directly impact the smoothness of your paint job. Remember to also have safety equipment on hand, such as gloves, a dust mask, and eye protection. These are especially important when sanding or using chemical cleaners. Achieving a Flawless Finish A flawless finish is the goal of any cabinet painting project. This section will cover techniques for smooth application and common mistakes to avoid. Applying Techniques for Smooth Results Achieving a smooth, professional-looking finish on your cabinets requires the right techniques. Jenna Kate at Home offers some excellent tips for a flawless application. Start by applying thin, even coats of paint. It's better to do multiple thin coats than one thick coat, which can lead to drips and an uneven finish. When using a brush, paint in long, smooth strokes in the direction of the wood grain. This helps minimize visible brush strokes. For larger flat surfaces, a foam roller can help achieve a smooth finish. Use light pressure and roll in one direction to avoid creating texture. Between coats, lightly sand with fine-grit sandpaper to smooth out any imperfections. Be sure to wipe away all dust before applying the next coat. Avoiding Common Painting Mistakes Even experienced DIYers can fall prey to common painting mistakes. Being aware of these can help you achieve better results. One frequent error is not allowing enough drying time between coats. Rushing this process can lead to peeling or bubbling paint. Follow the manufacturer's instructions for drying times. Another mistake is painting in poor lighting. Good lighting helps you spot missed spots or uneven areas. Natural daylight is best, but bright, even artificial light can work too. Skipping primer is a common shortcut that often leads to poor results. Primer helps the paint adhere better and can prevent stains from bleeding through. Lastly, don't forget to stir your paint thoroughly before and during use. This ensures consistent color and finish throughout your project. Selecting the Ideal Finish The finish of your paint can significantly impact both the look and durability of your cabinets. This section explores different finish options and their effects. Satin vs. Semi-Gloss: Pros and Cons When it comes to cabinet finishes, satin and semi-gloss are popular choices. Each has its own set of advantages and disadvantages. A satin finish offers a soft, pearl-like sheen that's less shiny than a semi-gloss finish. It's good at hiding surface imperfections and is easier to touch up. However, it may not be as durable or easy to clean as higher-gloss options. Semi-gloss, on the other hand, provides a shinier finish that's highly durable and easy to clean. It's resistant to moisture, making it a good choice for kitchens and bathrooms. The downside is that it can highlight imperfections in the cabinet surface. For a more in-depth comparison, check out this Reddit discussion on paint finishes for kitchen cabinets. Impact on Durability and Aesthetic Appeal The finish you choose can significantly affect both the longevity of your paint job and the overall look of your cabinets. Higher-gloss finishes, such as semi-gloss, tend to be more durable and resistant to wear and tear. They can withstand frequent cleaning and are less likely to show scuffs or scratches. Aesthetically, glossier finishes can make colors appear richer and more vibrant. They can also help brighten up a space by reflecting more light. Lower sheen finishes, such as satin, create a more subtle and sophisticated look. They're often preferred in modern or minimalist kitchen designs. Consider the style of your kitchen and your personal preferences when choosing a finish. Refresh Living offers some great insights on balancing durability and aesthetics in cabinet finishes. Planning and Execution A well-planned cabinet painting project can save time, reduce stress, and lead to better results. This section covers planning tips and essential considerations for drying and curing times. Effective Project Planning Tips Planning is key to a successful cabinet painting project. Here are some tips to help you prepare: Measure your cabinets and calculate the amount of paint needed. It's better to have a little extra than to run out mid-project. Create a timeline for your project, including prep work, painting, and drying times. Be realistic about how long each step will take. Prepare your workspace. Clear the area around your cabinets and set up a separate space for painting cabinet doors and drawers. Gather all necessary tools and materials before starting. This prevents interruptions once you begin painting. For more detailed planning advice, check out Stefana Silber's guide on cabinet painting. Ensuring Proper Drying and Curing Times Understanding the difference between drying and curing times is crucial for a successful cabinet painting project. Drying time refers to the period during which the paint is dry to the touch. This can range from a few hours to a day, depending on the type of paint and environmental conditions. Curing time, however, refers to the period during which the paint fully hardens and achieves its maximum durability. This can take several days to weeks. It's important to allow adequate time for both drying and curing. Rushing this process can lead to damaged paint, fingerprints, or sticking drawers and doors. For specific drying and curing times, always refer to the manufacturer's instructions. Designing Vibes offers a comprehensive review of different cabinet paints, including their drying and curing properties. Remember, patience during this final stage can make all the difference in achieving a professional, long-lasting finish on your cabinets. If you're looking for expert help with your cabinet painting project, consider reaching out to Scotty's Painting LLC for professional interior painting services.
By Adam Moore July 23, 2025
Best Bathroom Painting Tips Painting your bathroom can be a rewarding project that transforms your space. Let's explore some essential tips to ensure your bathroom painting project is a success. Choosing the Right Paint Selecting the right paint for your bathroom is crucial for a long-lasting finish. Moisture-resistant paints are a must in this humid environment. Look for paints labeled as bathroom-specific or with mildew-resistant properties. These formulations contain special additives that help prevent the growth of mold and mildew. Consider the sheen of the paint as well. Semi-gloss or satin finishes are often recommended for bathrooms because they're easier to clean and resist moisture better than flat finishes. Remember, lighter colors can make small bathrooms feel more spacious, while darker hues can create a cozy atmosphere. For color inspiration, check out this guide on the best bathroom colors . Preparing Your Bathroom Walls Proper wall preparation is key to achieving a smooth, professional-looking paint job in your bathroom. Clean the walls thoroughly with a degreasing cleaner to remove any soap scum, oils, or residue. Repair any cracks, holes, or imperfections with spackling compound. Sand the walls lightly to create a smooth surface for paint adhesion. Apply a quality primer, especially if you're making a significant color change or covering dark colors. Don't forget to protect fixtures, tiles, and floors with painter's tape and drop cloths before you begin painting. For a visual guide on wall preparation, watch this helpful YouTube tutorial . Handling Humidity in Bathrooms Bathrooms are naturally humid environments, which can pose challenges for paint application and longevity. To combat humidity issues, ensure proper ventilation during and after painting. Use exhaust fans or open windows to promote air circulation. Consider applying a moisture-sealing primer before painting, especially in areas prone to direct water contact. For ongoing humidity management, consider installing a high-quality exhaust fan if you don't already have one. Regular use of the fan during and after showers can significantly reduce moisture levels in your bathroom. Exploring Bathroom Color Schemes Choosing the right color scheme can dramatically impact the look and feel of your bathroom. Let's dive into some color considerations and trends. Color Psychology for Bathrooms The colors you choose for your bathroom can significantly affect your mood and the overall atmosphere of the space. Blue tones are often associated with calmness and cleanliness, making them a popular choice for bathrooms. They can create a serene, spa-like environment that promotes relaxation. Warm colors, such as soft yellows or peachy tones, can make a bathroom feel cozy and inviting. These hues can be particularly effective in bathrooms with limited natural light. Neutral colors such as whites, grays, and beiges offer versatility and timelessness. They can make small bathrooms feel more spacious and provide a clean backdrop for colorful accessories. For more insights on color psychology in home design, check out this Facebook group discussion . Popular Trends in Bathroom Colors Bathroom color trends are constantly evolving, reflecting broader design movements and personal preferences. Currently, we're seeing a rise in nature-inspired colors, with soft greens, earthy browns, and muted blues gaining popularity, bringing a sense of the outdoors into the bathroom space. Bold, statement colors are also making a comeback. Deep navy, rich emerald, or even black can create a dramatic and luxurious bathroom atmosphere when used thoughtfully. Two-tone color schemes are another trend to consider. This approach can add visual interest and depth to your bathroom. For ideas on two-tone designs, visit Scotty's Painting LLC's guide on two-tone looks . For a quick look at current color trends, check out this TikTok video showcasing popular bathroom colors. Creating Serene Bathroom Designs A serene bathroom design can turn your daily routines into relaxing rituals. The right color scheme plays a crucial role in achieving this peaceful atmosphere. Opt for a cohesive color palette with soft, muted tones. Pale blues, gentle greens, or warm neutrals can create a calming backdrop for your bathroom. Consider incorporating natural elements to enhance the serene feel. Wood accents, plants, or stone-inspired tiles can complement your chosen color scheme and bring a touch of nature indoors. Lighting also plays a key role in creating a serene atmosphere. Soft, warm lighting can make colors appear more soothing and create a relaxing ambiance. For professional advice on creating a serene bathroom design, consider reaching out to Scotty's Painting LLC for a consultation. Techniques for a Flawless Finish Achieving a flawless finish in your bathroom painting project requires the right techniques and materials. Let's explore some professional methods to elevate your results. Innovative Painting Techniques Innovative painting techniques can add unique texture and visual interest to your bathroom walls. One popular technique is color washing, which involves applying a translucent glaze over a base coat to create a soft, watercolor-like effect. This can be particularly effective in creating a spa-like atmosphere. Another interesting approach is ombre painting, where colors gradually blend from light to dark. This can add depth and dimension to your bathroom walls. For a more textured look, consider techniques like sponging or ragging. These methods can create subtle patterns that add character to your walls. For inspiration on unique painting techniques, check out this Facebook group dedicated to creative painting . Selecting Moisture-Resistant Paint Choosing the right moisture-resistant paint is crucial for the longevity of your bathroom paint job. Look for paints specifically formulated for high-moisture areas. These often contain mildewcides and have a higher sheen level to repel water. Consider paints with antimicrobial properties, which can help prevent the growth of mold and mildew in your bathroom's humid environment. Remember, proper surface preparation and priming are just as important and necessary as the paint itself in ensuring moisture resistance. For professional-grade moisture-resistant paints and application techniques, consider consulting with Scotty's Painting LLC . Maintaining Your Paint Job Proper maintenance can significantly extend the life of your bathroom paint job. Regular cleaning is key. Use a mild, non-abrasive cleaner to wipe down walls and remove any soap scum or water spots. Address any moisture issues promptly. Fix leaks, ensure proper ventilation, and use exhaust fans to reduce humidity levels in the bathroom. Touch up any chips or scratches as soon as they appear to prevent water from penetrating the paint layer. Consider applying a clear, waterproof sealer every few years to provide an extra layer of protection against moisture. Enhancing Bathroom Decor Once you've painted your bathroom, the right decor can elevate the space and complement your new color scheme. Let's explore some ideas to enhance your bathroom's overall look. Accessorizing with Bathroom Decor Ideas Thoughtful accessories can tie your bathroom's look together and add personality to the space. Consider adding plush towels in colors that complement or contrast with your wall color. This can create visual interest and a sense of luxury. Incorporate natural elements, such as plants or wooden accessories, to bring warmth and life to the space. Succulents or air plants are great low-maintenance options for bathrooms. Don't forget about functional decor. Stylish soap dispensers, toothbrush holders, and storage containers can be both practical and aesthetically pleasing. For more bathroom decor ideas, check out this Reddit thread for creative color schemes and customization ideas. Blending Materials for Cohesion Blending different materials can create a cohesive and interesting bathroom design. Consider how your paint color interacts with existing materials, such as tile, wood, or metal fixtures. Select colors that complement these elements to achieve a harmonious look. If you're updating cabinets along with your walls, Scotty's Painting LLC offers cabinet painting services that can help ensure a cohesive look throughout your bathroom. Don't be afraid to mix textures. Smooth painted walls can contrast beautifully with textured shower curtains or woven baskets.  Effective Use of Lighting Lighting plays a crucial role in how your paint color appears and the overall ambiance of your bathroom. Consider layering different types of lighting. Ambient lighting provides overall illumination, task lighting is vital for areas like the mirror, and accent lighting can highlight architectural features or artwork. The color temperature of your light bulbs can significantly affect how your paint color looks. Warm light can make colors appear more yellow, while cool light can bring out blue tones. Natural light is ideal for bathrooms when possible. If you have a window, consider light, sheer window treatments that allow sunlight to filter through. For expert advice on lighting and its impact on your bathroom's color scheme, consider consulting with professionals like those at Scotty's Painting . Small Bathroom Renovation Ideas Small bathrooms present unique challenges and opportunities. With the right approach, you can transform a compact space into a stylish and functional oasis. Transforming Small Spaces Small bathrooms can feel spacious and luxurious with the right design choices. Light colors are often recommended for small spaces as they can make the room feel larger and brighter. Consider pale blues, soft greens, or crisp whites. Vertical stripes can create the illusion of height in a small bathroom. This can be achieved through paint techniques or wallpaper. Mirrors can also help expand the visual space. Consider a large mirror or multiple smaller mirrors to reflect light and create depth. For more ideas on transforming small spaces, check out this Facebook group discussion on small bathroom renovations. Stylish Tile Selections Tiles can add character and style to your small bathroom while complementing your paint color. Large-format tiles can make a small bathroom feel more spacious by reducing the number of grout lines, creating a seamless appearance. Consider using these on the floor or in the shower area. For a cohesive look, you can choose tile colors that complement your wall paint. You might opt for a monochromatic scheme or create contrast with bold tile choices. Don't forget about grout color. Matching grout to your tiles can create a seamless look, while contrasting grout can add visual interest. For inspiration on stylish tile selections, take a look at Drew and Jonathan Scott's favorite design choices . Smart Storage Solutions Efficient storage is crucial in small bathrooms to maintain a clutter-free and spacious feel. Consider vertical storage options, such as tall, narrow cabinets or over-the-toilet shelving units. These maximize vertical space without occupying precious floor area. Built-in niches in shower areas or above sinks can provide storage without protruding into the room. Multi-functional furniture, such as a vanity with built-in storage or a mirror cabinet, can help maximize space efficiency. Don't forget about the back of the door. Over-the-door organizers or hooks can provide additional storage without taking up wall or floor space.